 |
| Herringbone Thank You Card |
Wednesday, November 16, 2011
Herringbone Cards
I'm sure I have mentioned before that herringbone is one of my favorite patterns. I was inspired by some recent DIY projects that I have seen on various blogs over the past few months and used Illustrator to design this herringbone pattern by hand.
In the future, I plan to expand the herringbone line to include birthday and congratulations cards in different colorways.
Antique Bicycle Notecards
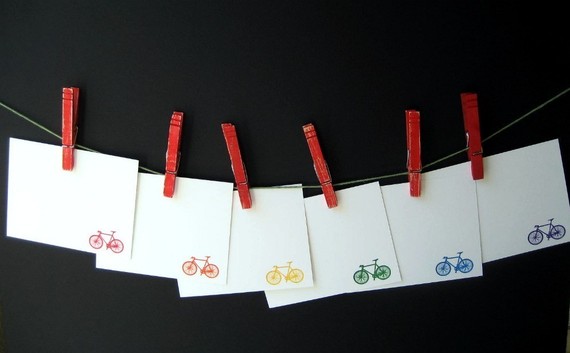
Also new in our etsy shop are these cool retro antique bicycle notecards. The first limited run comes in red. If they're popular, we'll explore other color options.
 |
| Antique Bicycle Notecards |
New Fluorescent Bicycle Notecards
I don't know why I thought I'd have so much time to work on new items while on maternity leave...here I am on the day before returning to the office, posting about a few new items in our etsy shop because I finally got around to taking some decent photos. At least I'm getting to it in time for the holidays...
The first new item is a Rainbow Pack of Fluorescent Bicycle Notecards. The classic rainbow pack has been a big favorite, but I thought I would go a little retro this time. I considered offering them with black envelopes, but most people don't have the special pens required to write on them, so I stuck with the standard kraft envelopes.


The first new item is a Rainbow Pack of Fluorescent Bicycle Notecards. The classic rainbow pack has been a big favorite, but I thought I would go a little retro this time. I considered offering them with black envelopes, but most people don't have the special pens required to write on them, so I stuck with the standard kraft envelopes.


Saturday, September 17, 2011
James and Evander

Since it was in our neighborhood, I stopped by the Rock Make street festival to check out some crafts and tunes. There were only a few food trucks and I had seen many of the vendors before at other street fairs, but I did stumble upon the lovely electronic pop of James and Evander. They remind me a little of Elkland and The Postal Service. I'm going to download their album today. =)

Friday, September 9, 2011
Wow! I wish I could check this place out in person.
I was reading through my frequented blogs this morning and Remodelista featured La Patisserie des Reves in Paris. Too bad I didn't get to check it out when I was there earlier this year! It's beautiful, as are the treats, I'm sure.

 {via Remodelista}

 |
| The treats are preserved under temperature-controlled domes on pulley systems! |

Wednesday, August 10, 2011
ChunkyPineapple Featured on Oh So Beautiful Paper!
Wowsers! Our Bicycle Note Card Rainbow Pack was featured on Oh So Beautiful Paper today. That's exciting and very flattering. I always see beautiful paper goods on that blog.
 |
| Bicycle Note Card Rainbow Pack |
Friday, August 5, 2011
Friday Wishlist -More Cool Seating
I know...I'm a bit obsessed with seating these days. There are just so many interesting things out there. It probably won't stop until I have a proper couch and a complete dining set.
Why do I love the Lin collection? The Lin Chair has such interesting lines. I am so curious to sit in one to see if it is comfortable. The Lin Bench also has such a clean look that would look great in the living room or on one side of my dining table. The Lin Chair and Bench do not use polyurethane foam, but rather use Dacron filling, which is made of polyester. The wool upholstery is chemical free.
And this rocker...I love the way the wood is shaped so that each side looks like one piece.
Sigh....more reasons to win the lottery...
Why do I love the Lin collection? The Lin Chair has such interesting lines. I am so curious to sit in one to see if it is comfortable. The Lin Bench also has such a clean look that would look great in the living room or on one side of my dining table. The Lin Chair and Bench do not use polyurethane foam, but rather use Dacron filling, which is made of polyester. The wool upholstery is chemical free.
 |
| De La Espada Lin Chair |
 |
| De La Espada Lin Bench |
 |
| De La Espada Sleepy Rocker |
Sigh....more reasons to win the lottery...
Tuesday, August 2, 2011
Manhattan Rooftop Garden Project
I have to give props to my sister for her recent television interview. She writes a blog on rooftop gardening in Manhattan. She started it a few years back when she was a law student and we all thought she was crazy. Since then she's been featured documentaries, books, quoted by Reuters and interviewed on television. Very cool.
This material is copyrighted by the Trinity Broadcasting Network.
Monday, August 1, 2011
So Unique!
This has to be one of the coolest chairs I have ever seen. Unfortunately, it has already been sold. =(
 |
| {via MidCentury Mobler} |
Saturday, July 16, 2011
Lemon Blueberry Bread
We stopped by Arizmendi Bakery on the way back from the pediatrician's office yesterday and they had Lemon Blackberry Bread as a special. Inspired...I decided to use some meyer lemons from my tree and the blueberries I snagged at Trader Joe's a few days ago to make something similar.

Lemon Blueberry Bread
Ingredients
1/4 cup melted butter
3/4 cup white sugar (If you like things on the sweeter side, go with 1 cup)
3 tablespoons lemon juice
2 eggs
1 1/2 cups all-purpose flour
1 teaspoon baking powder
1 teaspoon salt
1/2 cup milk
2 tablespoons grated lemon zest
1 cup fresh blueberries
1) Preheat oven to 350 degrees F. Lightly grease an 8x4 inch loaf pan.
2) In a mixing bowl, beat together butter, sugar, juice and eggs. Combine flour, baking powder and salt; stir into egg mixture alternately with milk. Fold in lemon zest and blueberries. Pour batter into prepared pan.
3) Bake in preheated oven for 60 to 70 minutes, until a toothpick inserted into center of the loaf comes out clean. Cool bread in pan for 10 minutes. Cool on a wire rack.
Friday, July 15, 2011
Friday Wishlist - Washi Tape Walls
 |
| {via Poppytalk} |
Tuesday, July 12, 2011
The Adventures of Baby CP
For those of you who want to stay on top of the comings and goings of our new family member, check out the new blog The Adventures of Baby CP.


Monday, July 11, 2011
More Uses For Lemons
I haven't posted any lemon recipes recently. I've mainly been making lemonade with the lemons I've been picking since Baby CP takes up so much of my time. I saw this posting on the many household uses for lemons on Apartment Therapy today though and thought I'd share.
Saturday, June 25, 2011
Some Saturday Cuteness
It's a beautiful Saturday and little CP just went down for a nap...thought I would share some cute Etsy finds with you all...
 |
| Needle Felted Owl by FeltJar |
 |
| Peach Snail Amigurumi by CuteWorkshop |
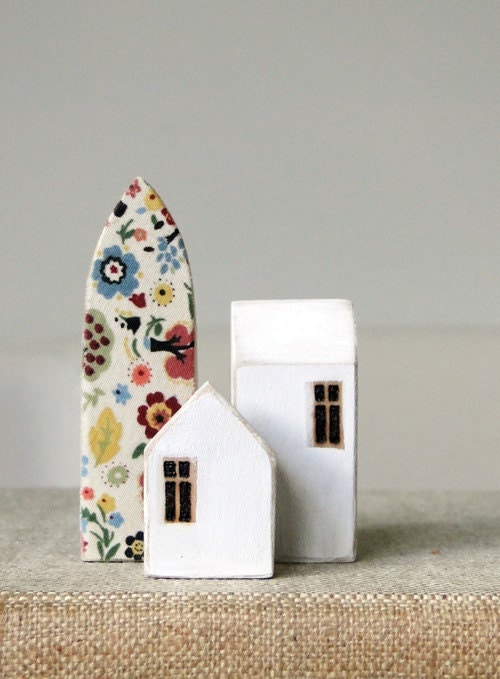 |
| Folk Miniature Wood Town by Says The Tree |
 |
| Pudgy Snowbird by BubbleTime |
Thursday, June 16, 2011
Our BedRoom is Finally Painted!
Since my last day of work, which coincidentally was also Mr. CP's last day of school, we were very busy working on the house and running errands. Some tasks were in preparation for the baby, like taking the hospital tour, writing up a birth plan and setting up diaper service, while others were things we just wanted to get done because we knew we would be too sleep deprived to tackle them after the baby arrived.
Below for your viewing enjoyment are some before and after photos of our bedroom. We still have to finish the room the baby will eventually sleep in, but I figured if we at least mostly finished our room, we'd have some place for all of us to sleep for at least a few months before we move the baby into his permanent digs.
The room started out with relatively cheerful yellow walls and an off white ceiling. There were a number of cracks in the walls, that I decided to repair with some spackle and joint tape (and some help from my brother).
We decided to go with a no VOC primer and paint for a number of reasons, mainly since I was pregnant and at home for most of the day after I stopped working and because the baby would be moving in so soon. It's also good to reduce the future off-gassing in the house in general.
And here is the painted room...For colors, we choose a soothing light gray and a Benjamin Moore shade called snow white for the ceiling and mouldings. We purchased our paint at Ecohaus here in San Francisco. They used the Yolo brand base and tinted it with the Mythic and Benjamin Moore shades that we had chosen. The job definitely required two coats for the ceiling and the walls, though I suspect that many or all no-VOC paints require a double coat, because they are less pigmented than conventional paints.

 We still have to install baseboards eventually, but that's a project for another time. We did manage to find a close match to the moulding that we removed at a place in Millbrae called The Moulding Company. The staff there was helpful and we'll probably order from them when we're ready. We are also planning to replace all of the doors, so we didn't bother to paint them for now.
Below for your viewing enjoyment are some before and after photos of our bedroom. We still have to finish the room the baby will eventually sleep in, but I figured if we at least mostly finished our room, we'd have some place for all of us to sleep for at least a few months before we move the baby into his permanent digs.
The room started out with relatively cheerful yellow walls and an off white ceiling. There were a number of cracks in the walls, that I decided to repair with some spackle and joint tape (and some help from my brother).
 |
| Close up of a plaster crack |
 |
| First layer of joint compound |
 |
| Third layer of spackle (courtesy of my brother). It was a lot of work! |
We decided to go with a no VOC primer and paint for a number of reasons, mainly since I was pregnant and at home for most of the day after I stopped working and because the baby would be moving in so soon. It's also good to reduce the future off-gassing in the house in general.
And here is the painted room...For colors, we choose a soothing light gray and a Benjamin Moore shade called snow white for the ceiling and mouldings. We purchased our paint at Ecohaus here in San Francisco. They used the Yolo brand base and tinted it with the Mythic and Benjamin Moore shades that we had chosen. The job definitely required two coats for the ceiling and the walls, though I suspect that many or all no-VOC paints require a double coat, because they are less pigmented than conventional paints.


Wednesday, June 15, 2011
He's here!
Sorry, I've been MIA for a few days. Our Little CP arrived on June 7 at 6.18pm weighing in at 7 lbs and 15 oz and measuring 20.5 inches tall. Here are some photos from his first day at home.

 |
| Almost a smile! |
 |
| Check out my nostrils. |

Saturday, June 4, 2011
Apple Cinnamon Sticky Rolls
When I was in high school, my siblings and I went to day camp where we played violin in a youth orchestra. In the afternoons, we would participate in different activities such as hanging out at a pool, playing ping pong or baking delicious cinnamon rolls. I was craving those rolls recently and decided to make something similar with the addition of some apples.
Ingredients
For the Dough:
1 envelope (= 2 1/4 teaspoons) yeast
3/4 cup milk, warmed to about 100°F
1/2 cup (1 stick) unsalted butter, very soft
1/4 cup white sugar
2 teaspoons vanilla extract
4 1/2 cups flour
1/2 teaspoon salt
2 eggs
For the Apple Filling
2 large cooking apples, chopped
1 tablespoon AP flour
1/4 cup white sugar
1/8 cup butter
1 teaspoon cinnamon
1/4 teaspoon nutmeg
Instructions
1) In the bowl of a stand mixer sprinkle the yeast over the warmed milk and
let it sit for a couple minutes.


2) With the mixer paddle, stir in the softened butter, sugar, vanilla, and one cup of the flour.
3) Stir in the salt and nutmeg. Stir in the eggs and enough of the remaining flour to make a soft yet sticky dough.

4) Switch to the dough hook and knead for about 5 minutes or knead by hand for 5-7 minutes or until the dough is elastic and pliable.

5) Spray the top of the dough with vegetable oil, and turn the dough over so it is coated in oil. Cover the bowl with plastic wrap and a towel and let the dough rise until nearly doubled - about an hour.
6) Prepare the apple filling - In a saucepan, mix the chopped apple pieces, flour, sugar and butter and bring to a boil over medium high heat. Cook for about 3 minutes. Reduce heat to medium low and cook for another 10 minutes, stirring constantly until thick. Stir in cinnamon and nutmeg. Cool completely.


7) Lightly grease a 13x9 inch baking dish with baking spray or butter. (I use a small convection oven, so I split the rolls into one 8x8 inch dish and one 5x8 inch dish.) On a floured surface pat the dough out into a large yet still thick rectangle of about 10x15 inches. Spread evenly with the filling over the dough. Roll the dough up tightly, starting from the top long end. Cut the long dough roll into 12 even rolls, and place them, cut side up, in the prepared baking dish.


8) Cover the rolls with a towel and let them rise for an hour or until puffy and nearly doubled.

9) Heat the oven to 350°F. Place the risen rolls in the oven and bake for 30 minutes or until a thermometer inserted into a center roll reads 190°F.
Ingredients
For the Dough:
1 envelope (= 2 1/4 teaspoons) yeast
3/4 cup milk, warmed to about 100°F
1/2 cup (1 stick) unsalted butter, very soft
1/4 cup white sugar
2 teaspoons vanilla extract
4 1/2 cups flour
1/2 teaspoon salt
2 eggs
For the Apple Filling
2 large cooking apples, chopped
1 tablespoon AP flour
1/4 cup white sugar
1/8 cup butter
1 teaspoon cinnamon
1/4 teaspoon nutmeg
Instructions
1) In the bowl of a stand mixer sprinkle the yeast over the warmed milk and
let it sit for a couple minutes.


2) With the mixer paddle, stir in the softened butter, sugar, vanilla, and one cup of the flour.
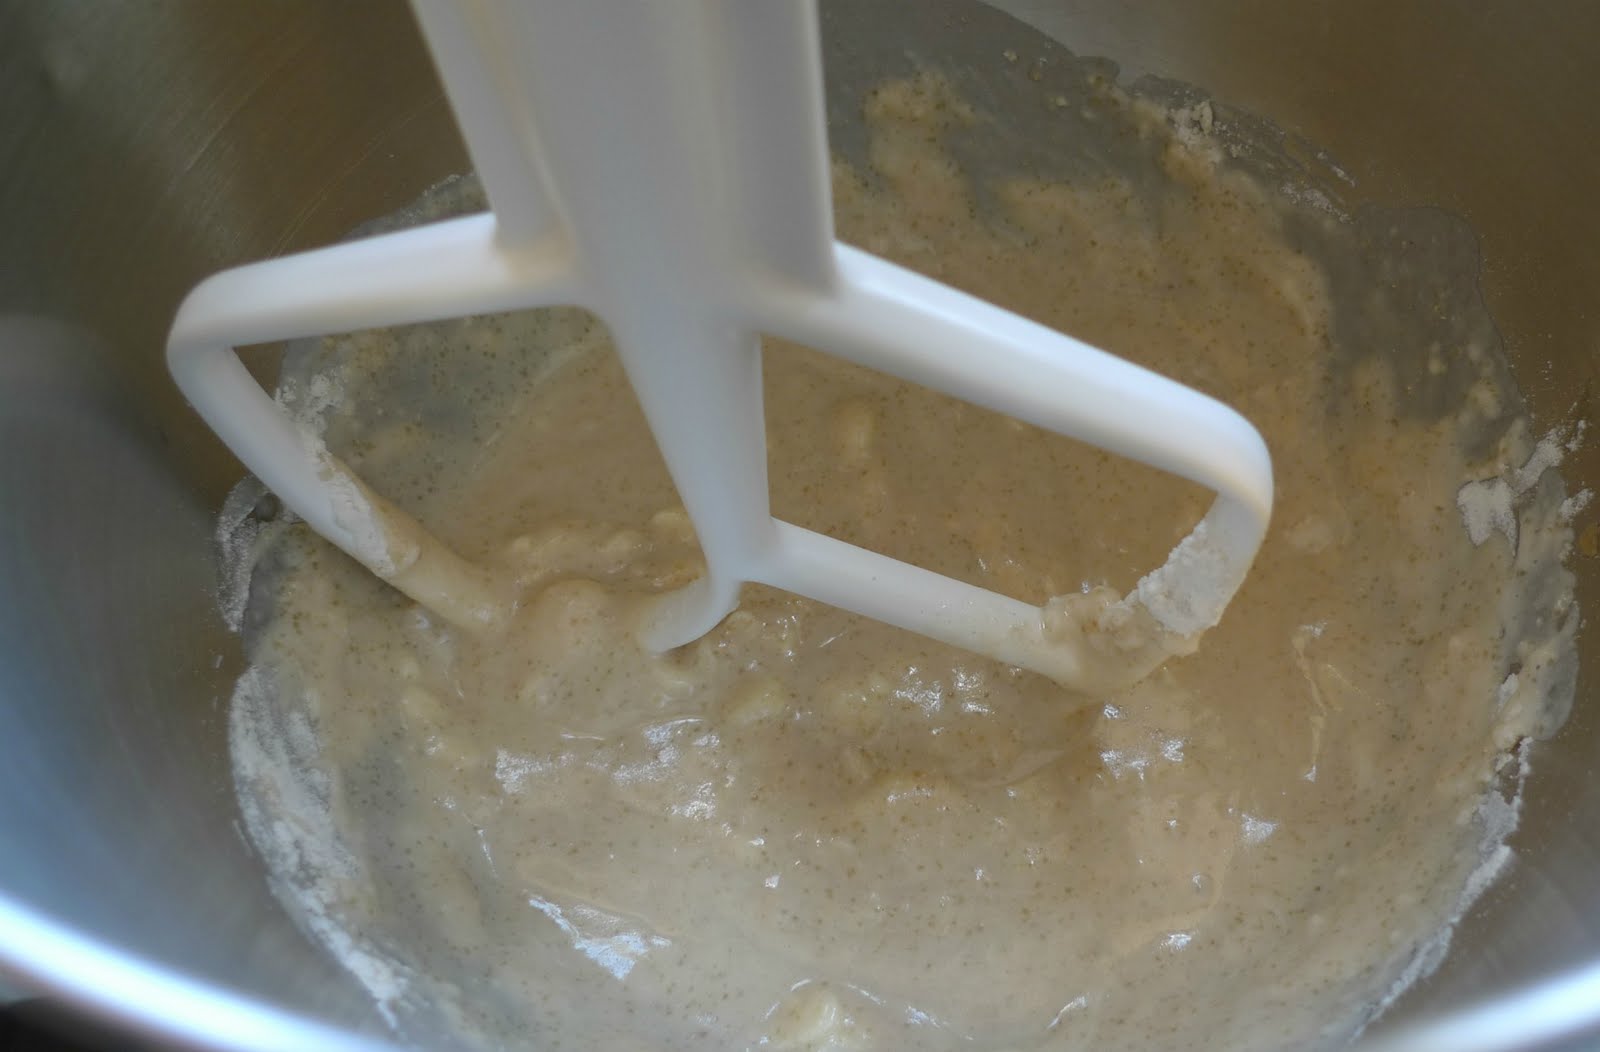
3) Stir in the salt and nutmeg. Stir in the eggs and enough of the remaining flour to make a soft yet sticky dough.

4) Switch to the dough hook and knead for about 5 minutes or knead by hand for 5-7 minutes or until the dough is elastic and pliable.

5) Spray the top of the dough with vegetable oil, and turn the dough over so it is coated in oil. Cover the bowl with plastic wrap and a towel and let the dough rise until nearly doubled - about an hour.
6) Prepare the apple filling - In a saucepan, mix the chopped apple pieces, flour, sugar and butter and bring to a boil over medium high heat. Cook for about 3 minutes. Reduce heat to medium low and cook for another 10 minutes, stirring constantly until thick. Stir in cinnamon and nutmeg. Cool completely.


7) Lightly grease a 13x9 inch baking dish with baking spray or butter. (I use a small convection oven, so I split the rolls into one 8x8 inch dish and one 5x8 inch dish.) On a floured surface pat the dough out into a large yet still thick rectangle of about 10x15 inches. Spread evenly with the filling over the dough. Roll the dough up tightly, starting from the top long end. Cut the long dough roll into 12 even rolls, and place them, cut side up, in the prepared baking dish.


8) Cover the rolls with a towel and let them rise for an hour or until puffy and nearly doubled.

9) Heat the oven to 350°F. Place the risen rolls in the oven and bake for 30 minutes or until a thermometer inserted into a center roll reads 190°F.
Thursday, June 2, 2011
How is it already June?
I can't believe how quickly June has arrived. Grandma CP lands in SF today in anticipation of the arrival of Baby CP, which should be any day now. Grandma CP will be in town for about a month to help out. I'm sure I'll be needing it!
After we get her settled in, the first task on the list will probably be food shopping. My mom will probably be taking over most of the cooking responsibilities here and we need to stock up on those healthy green veggies and protein for Chinese soups and other yummies!
After we get her settled in, the first task on the list will probably be food shopping. My mom will probably be taking over most of the cooking responsibilities here and we need to stock up on those healthy green veggies and protein for Chinese soups and other yummies!
Wednesday, June 1, 2011
Bicycle Notecards Back in Stock!
In addition to printing my 2011 Father's Day Cards over the long weekend, I also printed 20 sets of our popular Bicycle Note Cards Rainbow Pack. They're ready to ship now!


 |
| ChunkyPineapple on Etsy |
Tuesday, May 31, 2011
2011 Father's Day Cards Are Here!
Father's Day is just a few weeks away and quickly approaching!
This year, I decided to print our Happy Father's Day card in red ink on a few different colors of cardstock. My favorite is the red ink on heavyweight cappuccino gold leaf coverstock, but I think the red ink on blue has a very fun retro look. This is a limited run of 15 cards.
 Last year, I printed the design with blue ink on a variety of colors of cardstock. If you prefer the blue, we only have two 2010 cards left in stock in our etsy store.
This year, I decided to print our Happy Father's Day card in red ink on a few different colors of cardstock. My favorite is the red ink on heavyweight cappuccino gold leaf coverstock, but I think the red ink on blue has a very fun retro look. This is a limited run of 15 cards.
 |
| ChunkyPineapple on Etsy |

Sunday, May 29, 2011
The Backyard - Phase II
Phase II of our garden makeover was completed a couple months ago. The back of the yard was sheet mulched and all of the trees were pruned, including the lemon tree, which of course means another few dozen lemons were harvested, but there are still so many more.
Afterwards, my brother and I installed the scarecrow sprinkler. It seems to be working, because I haven't seen any cats in the yard since.
 |
| New mulch |
 |
| Our cleaned up lemon tree and butterfly bush |
 |
| Pruned persimmon tree and herbs planted in the corner |
 |
| Two cherry tomato plants planted in the back section |
Afterwards, my brother and I installed the scarecrow sprinkler. It seems to be working, because I haven't seen any cats in the yard since.
Saturday, May 28, 2011
Lemon Curd Favors
Mr.CP and I decided to throw a pre-baby party after all. The get-together was co-ed, we didn't call it a baby shower and we did not play any weird baby shower games. I was able to reserve a couple picnic tables at Presidio Heights Playground and guests each brought something tasty for a potluck style lunch.
As baby party favors, I decided to make good use of my lemons and made little jars of lemon curd for our guests.

Lemon Curd
(yields 3 cups)
Ingredients
9 Tbs unsalted butter, softened at room temperature
1 1/4 cup sugar
3 large eggs
3 large egg yolks
1 cup fresh lemon juice
2 Tsp grated lemon zest
Directions
In a large bowl, beat the butter and sugar with an electric mixer for about 2 minutes.

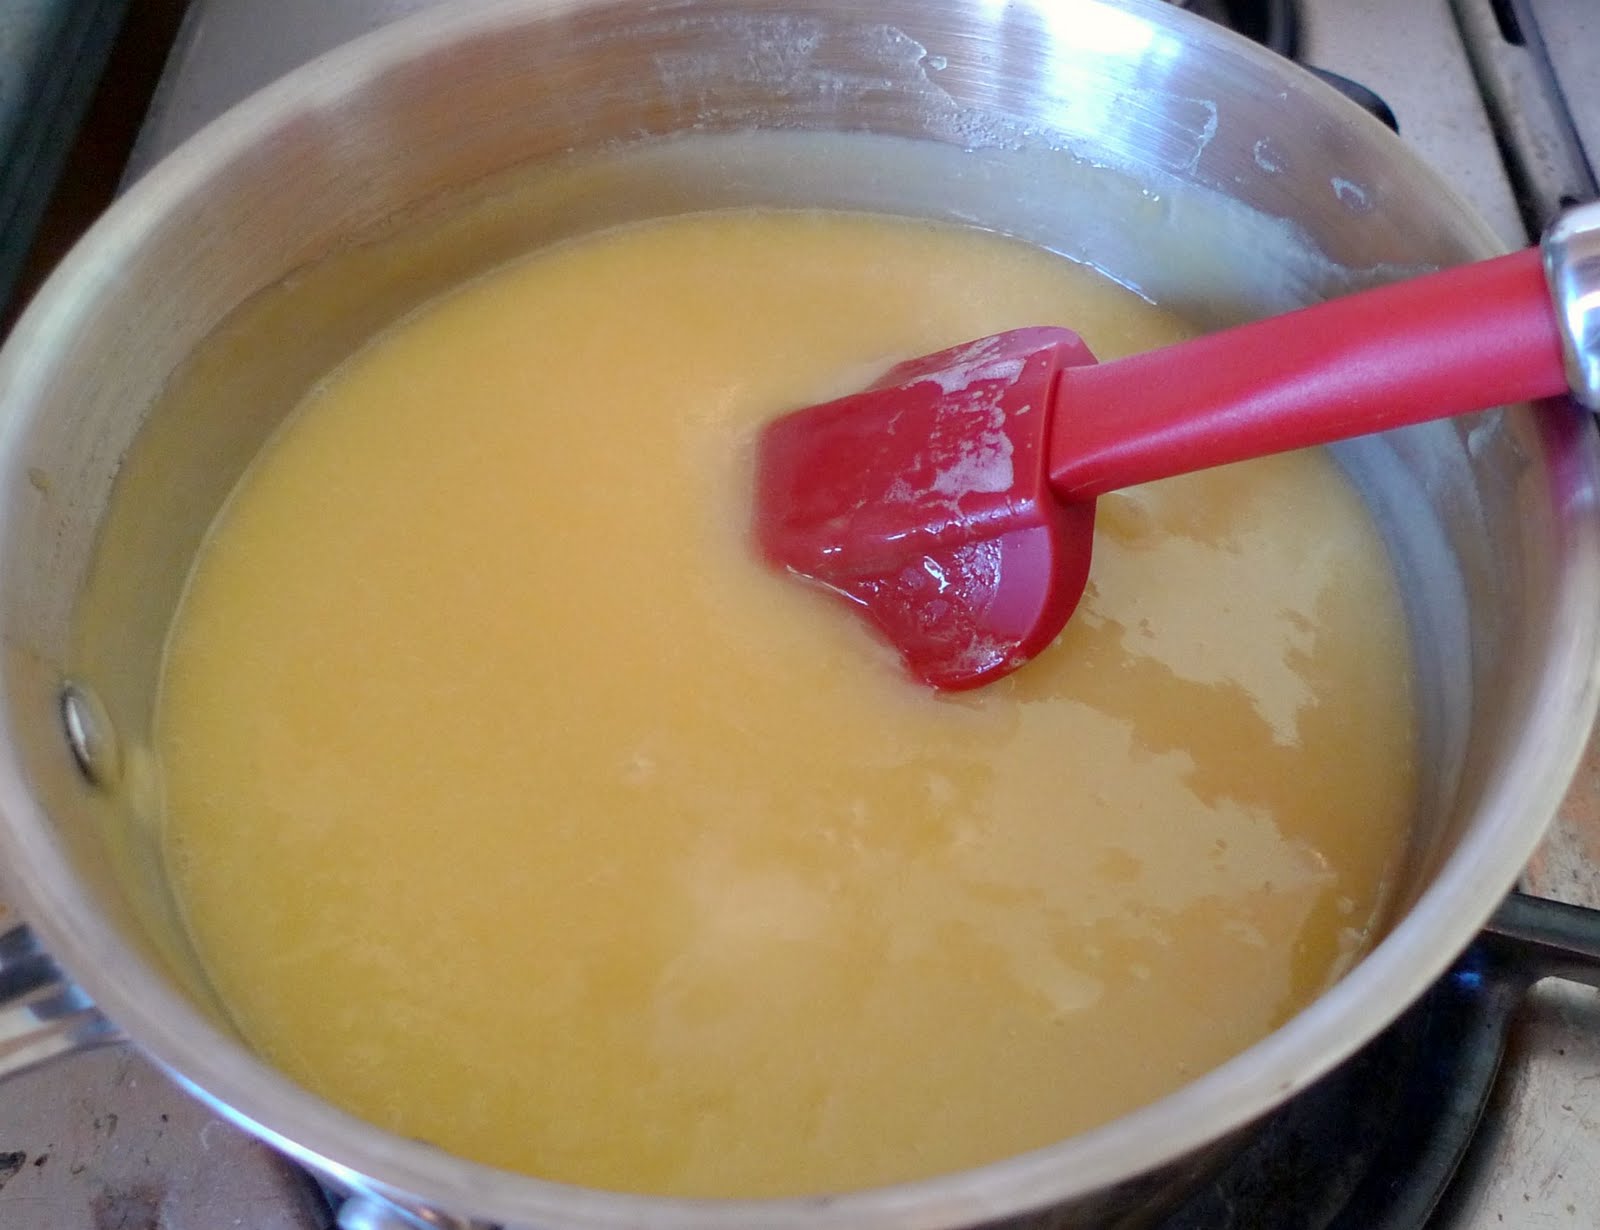
 Slowly add the eggs and yolks and beat for 1 minute total. Mix in the lemon juice - the mixture will look curdled, but it will smooth out as it cooks.
In a medium, heavy-based saucepan, cook the mixture over low heat until it looks smooth. (The curdled appearance disappears as the butter in the mixture melts.) Increase the heat to medium and cook, stirring constantly, until the mixture thickens, about 15-20 minutes. It should leave a path on the back of a spoon and will read 170°F on a thermometer. Do not let the mixture boil.


 Remove the curd from the heat; stir in the lemon zest and pour into a bowl or the jars and refrigerate. I used 4 oz canning jars
 to make the favors.

As baby party favors, I decided to make good use of my lemons and made little jars of lemon curd for our guests.

Lemon Curd
(yields 3 cups)
Ingredients
9 Tbs unsalted butter, softened at room temperature
1 1/4 cup sugar
3 large eggs
3 large egg yolks
1 cup fresh lemon juice
2 Tsp grated lemon zest
Directions
In a large bowl, beat the butter and sugar with an electric mixer for about 2 minutes.


In a medium, heavy-based saucepan, cook the mixture over low heat until it looks smooth. (The curdled appearance disappears as the butter in the mixture melts.) Increase the heat to medium and cook, stirring constantly, until the mixture thickens, about 15-20 minutes. It should leave a path on the back of a spoon and will read 170°F on a thermometer. Do not let the mixture boil.


Subscribe to:
Posts (Atom)